Implementing User Authentication with TypeScript and Firebase
Creating a User Login and Registration System with TypeScript and Firebase


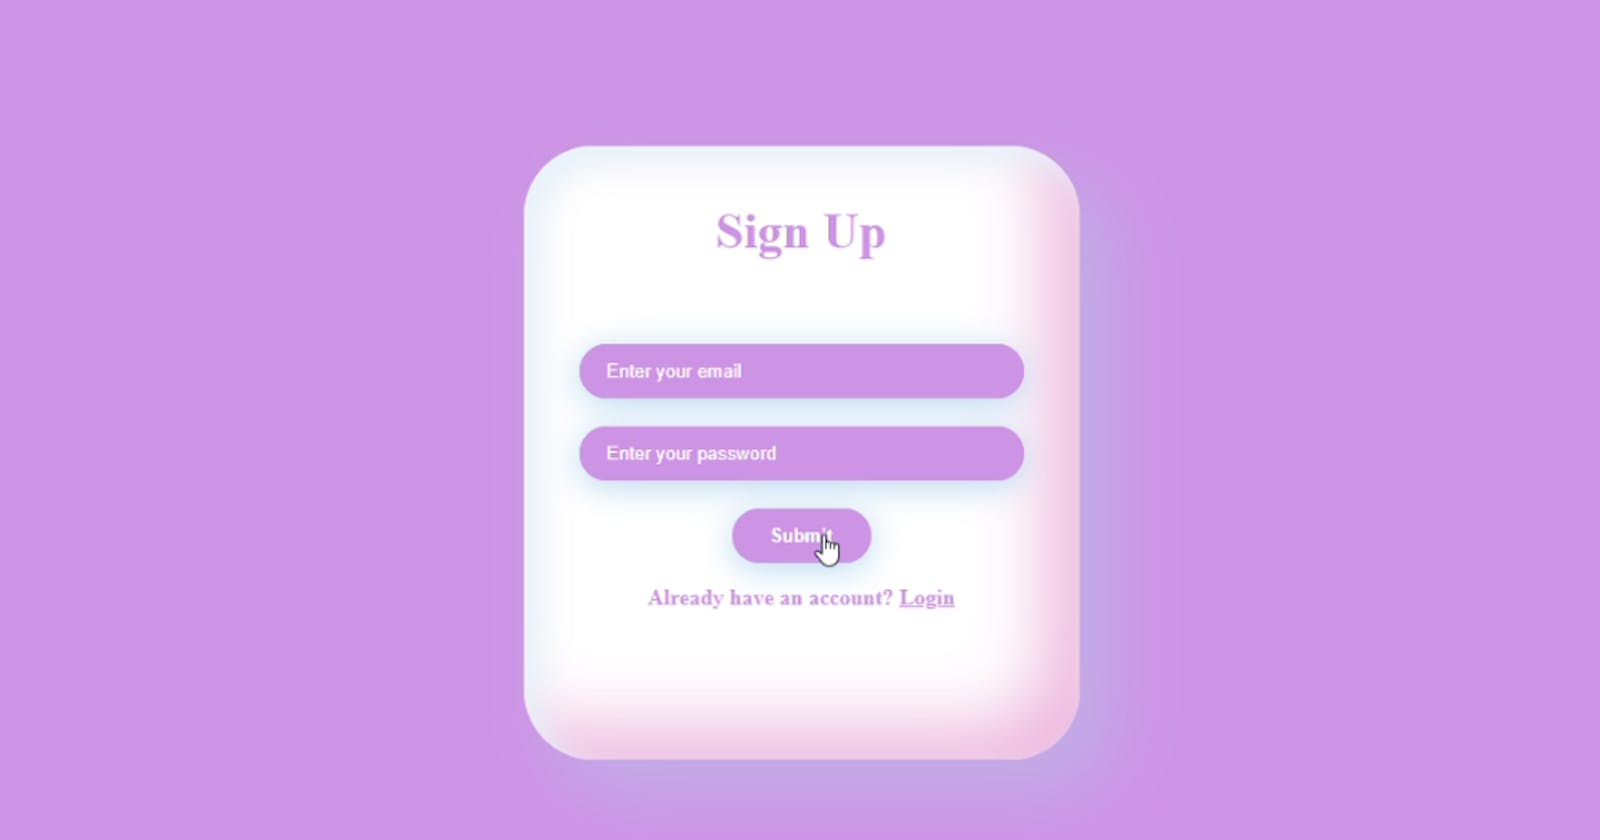
When you create a website and want it to have a sign-up and login page to authenticate users, you will undoubtedly need an authentication form to do so. We would only use the Firebase authentication service.
In this article, I'll show you how to make an authentication form with typescript and Firebase.
Setting up Firebase
Firebase is a backend-as-a-service (BaaS), which means it allows developers to connect their applications to backend cloud storage without having to build their own. It provides several services, one of which is user authentication.
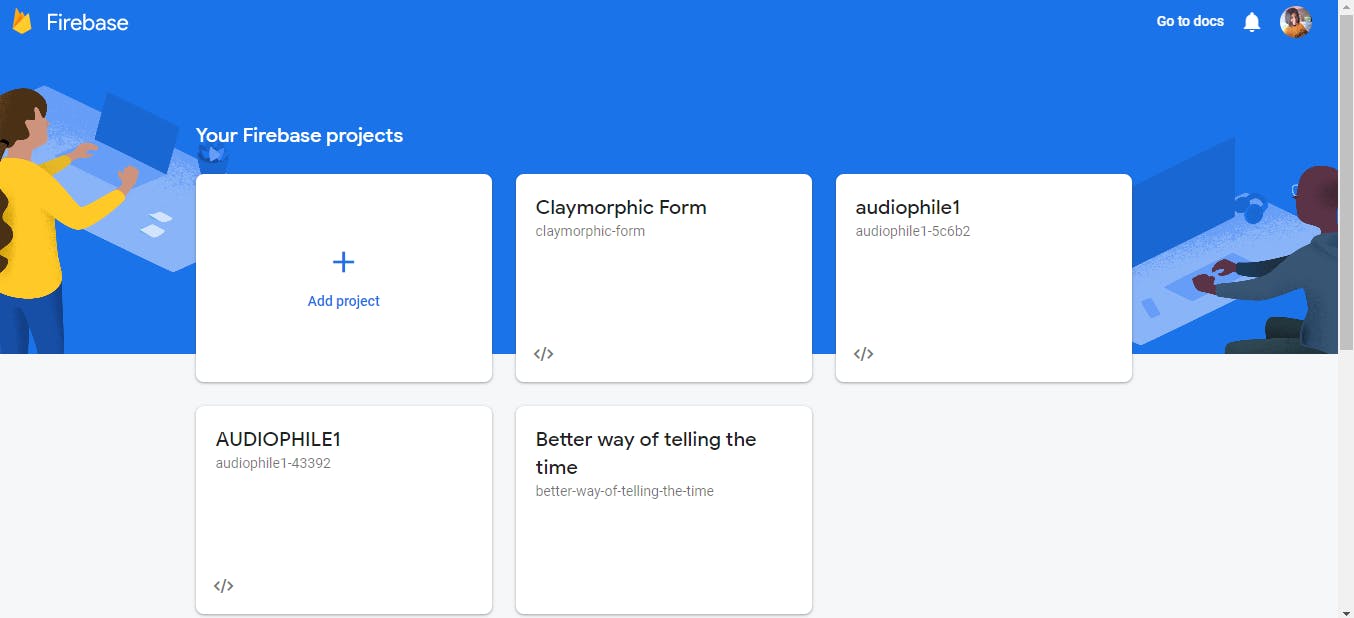
To begin, we'd need to create a Firebase project. Click "Add Project" and follow the steps.
This will take us to the project overview page. The project overview page includes links to the various Firebase services associated with your projects, including the real-time database, cloud firestore, and cloud functions.
Click on the '</>' button, then follow the process.

After successfully registering your app, you should be directed to a page with a code snippet that you must copy because we will require it for our app.
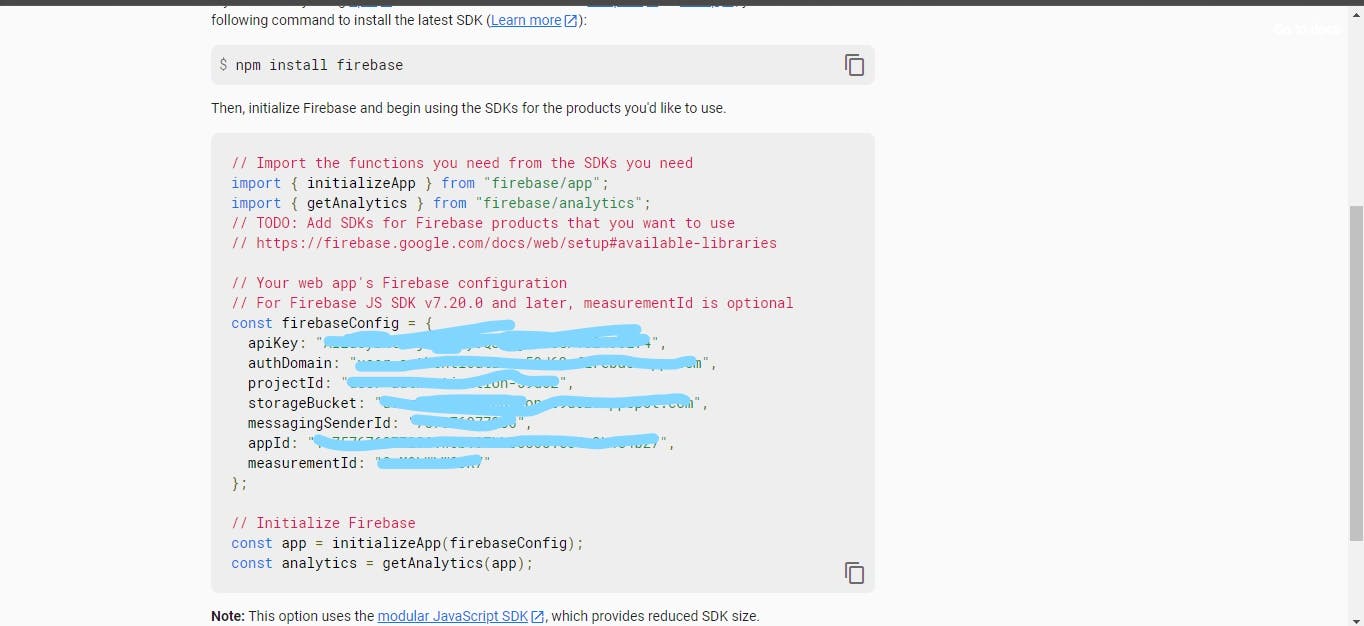
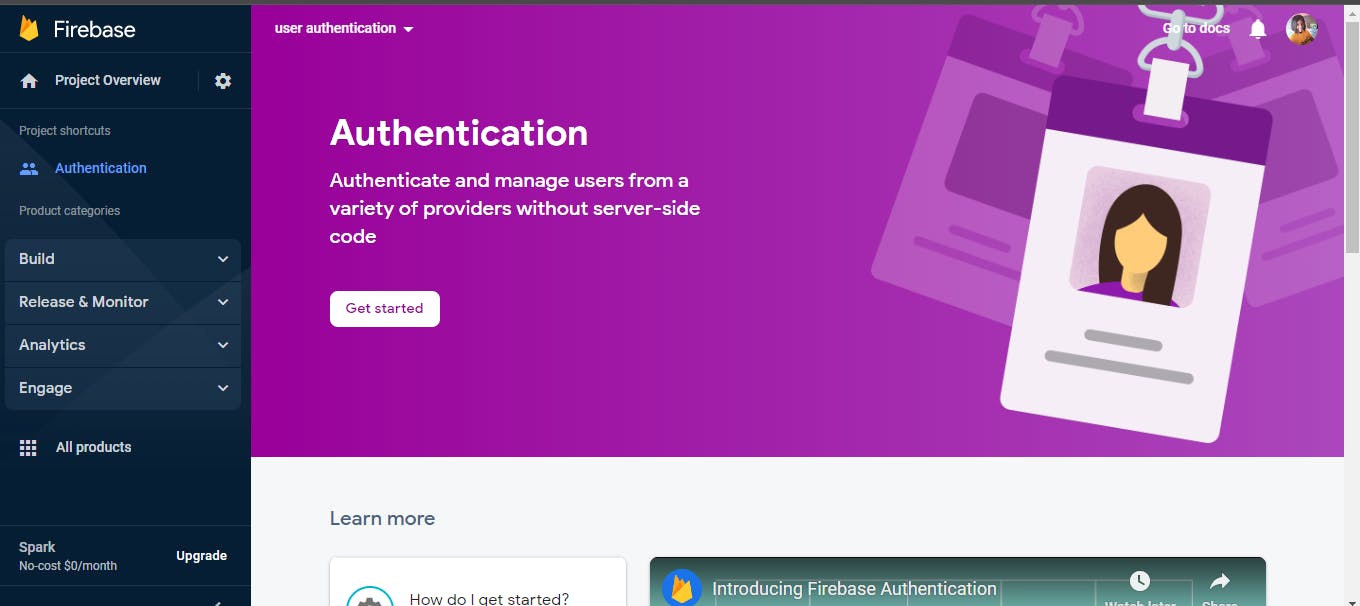
This code snippet launches the Firebase SDK and connects to the Firebase servers. Select the "continue to console" option. This should return you to the project overview page. Select authentication from the "build" drop-down arrow.
To enable the service, click the "Get Started" button.
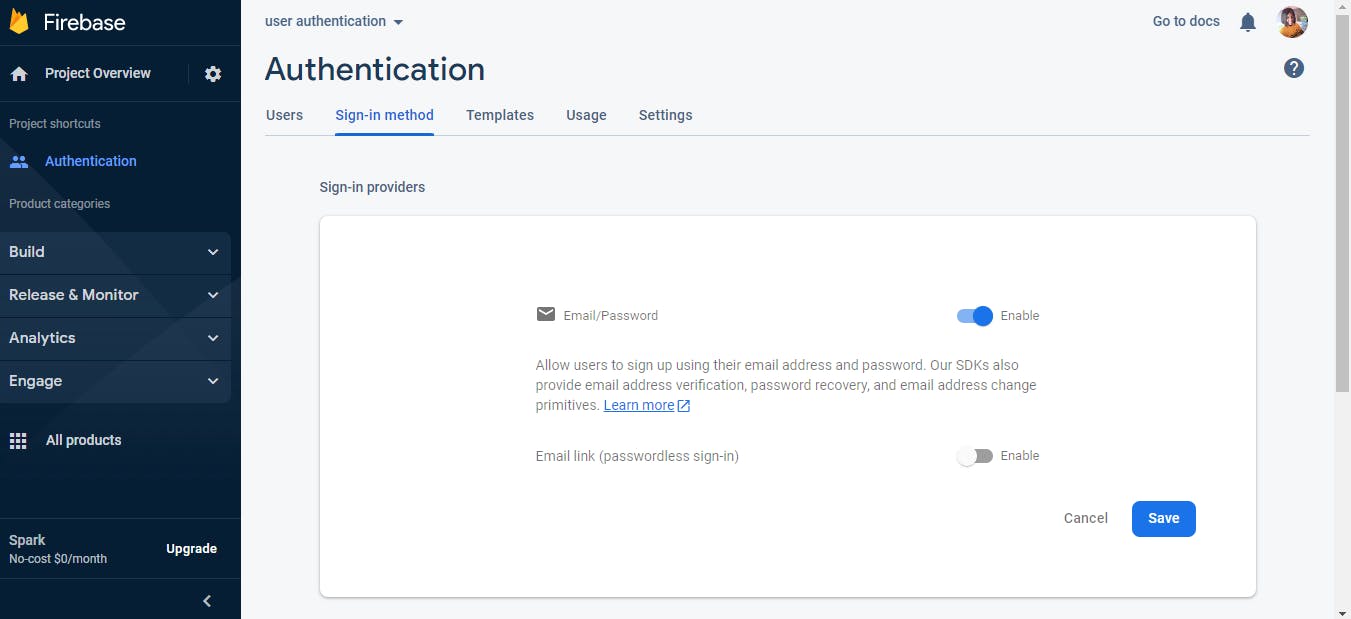
Click "Sign-in Method" to select the sign-in providers that your app may require. We will enable the email/password provider in this article. This is how it should appear:
Creating a form for sign-up and login authentication
We have completed the necessary Firebase configuration; now we must create Firebase authenticated forms. When we send data from our forms, it'd be stored in the "Users" section on the authentication page like this:
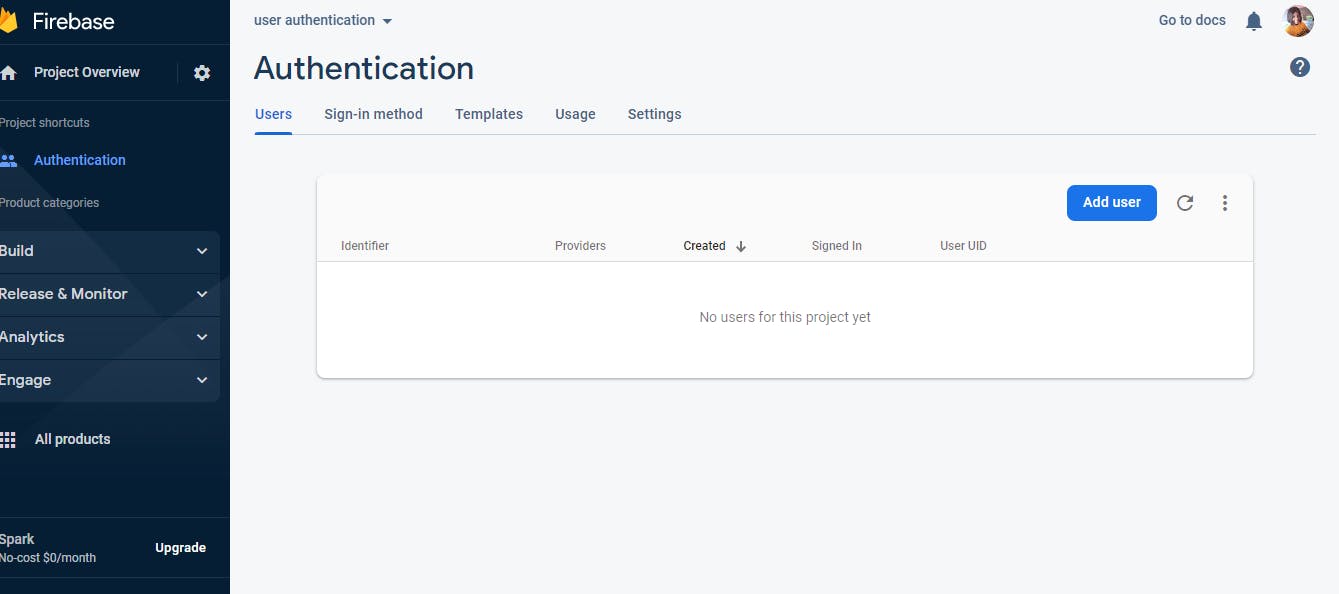
This section is currently empty because we have not yet sent any data. So, let's get started.
Install Firebase in your terminal by entering the following code:
npm install firebase --save
After installing the library, make a "contexts" folder inside the "src" folder and add an "AuthenticationContext" file to it. We're using context so we don't have to copy the Firebase configuration code into each form; instead, we'll just pass data through the component tree.
The code's purpose is to configure your application to use Firebase services. It contains information such as your Firebase project's API key, the authentication method (such as email or password authentication), and the Firebase Realtime Database URL. This setting is required for your application to communicate with Firebase and access its functionality.
The code in this file should be as follows:
import React, { createContext, useContext } from 'react'
import { initializeApp } from 'firebase/app'
import { getAuth } from 'firebase/auth'

export const AuthenticationContext = createContext()

const AuthenticationContextProvider = ({ children }) => {
  // Your web app's Firebase configuration
  const firebaseConfig = {
    apiKey: '*****************************',
    authDomain: '***********************************',
    databaseURL: '********************************************',
    projectId: '*************',
    storageBucket: '*******************************',
    messagingSenderId: '*************',
    appId: '******************************',
    measurementId: '*************',
  }
  // Initialize Firebase
  const app = initializeApp(firebaseConfig)
  const auth = getAuth(app)
  return (
    <AuthenticationContext.Provider
      value={{
        firebaseConfig,
        auth,
      }}
    >
      {children}
    </AuthenticationContext.Provider>
  )
}

export default AuthenticationContextProvider
The "createUserWithEmailAndPassword" method on the sign-up form allows you to create a new user account with an email address and password. This method will send a request to the Firebase authentication server to create a new user account with the specified email and password.
To use the "createUserWithEmailAndPassword" method, we must import it into the "Signup" file as follows:
import { createUserWithEmailAndPassword } from 'firebase/auth'
We'd also need to import "AuthenticationContext" to use the props we passed from there.
import { AuthenticationContext } from '../context/AuthenticationContext'
The information would be saved using the UseState hook (email and password1). We would also use a useContext to call the "auth" object from the "AuthenticationContext" because it would allow us to create a user account.
const [email, setEmail] = useState('')
const [password1, setPassword1] = useState('')
const { auth } = useContext(AuthenticationContext)
This function in the code snippet below allows us to create a new user, and if the user is successfully registered, we will receive a Windows alert and be redirected to the login page. If the registration failed, we'd receive a Windows alert message with an error message.
const onSubmit = async (e) => {
    e.preventDefault()

    await createUserWithEmailAndPassword(auth, email, password1)
      .then((userCredential) => {
        // Signed in
        const user = userCredential.user
        console.log(user)
        window.alert('successfully registered')
        window.location.replace('http://localhost:5173/Login')
        // ...
      })
      .catch((error) => {
        const errorMessage = error.message
        window.alert(errorMessage)
        // ..
      })
  }
The text entered by the user will update the value attribute in the code snippet below. When the value of an element changes, the onChange event is triggered. It determines the email variable based on what the user enters.
  <input
     type='email'
     placeholder='Enter your email'
     onChange={(e) => setEmail(e.target.value)}
     required
     value={email}
    />
The login form includes the Firebase authentication service's "signInWithEmailAndPassword" method, which allows you to sign in to your application using the email address and password you used when you registered for it. When you call this method, it will send a request to the Firebase authentication server to sign the user in using the specified email address and password.
import { signInWithEmailAndPassword } from 'firebase/auth'
import { AuthenticationContext } from '../context/AuthenticationContext'
 const Login = (e) => {
    e.preventDefault()
    signInWithEmailAndPassword(auth, email, password)
      .then((userCredential) => {
        // Signed in
        const user = userCredential.user
        window.alert('successfully Logged in')
        window.location.replace('http://localhost:5173/Dashboard')
        console.log(user)
      })
      .catch((error) => {
        const errorMessage = error.message
        window.alert(errorMessage)
      })
  }
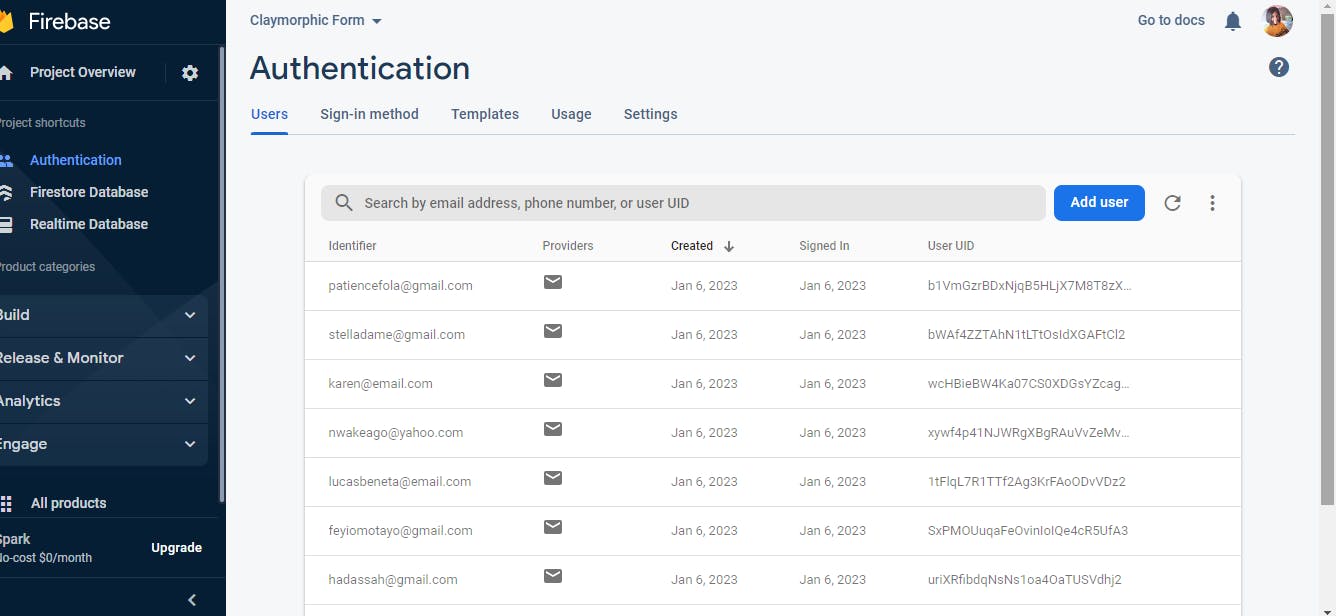
So, when a user signs up, the following information appears in the "user" section:
Conclusion
Using TypeScript and Firebase to implement user authentication is a powerful and effective way to build secure login and registration functionality in your application. You can build a robust and scalable authentication system that is easy to maintain and improve over time by leveraging the features and tools provided by these technologies.
You can use TypeScript to write cleaner, more reliable code by leveraging the benefits of static typing and strong type checking. You can also easily store and manage user data with Firebase, as well as implement authentication methods such as email and password login and social media login.