


You've come to the right place if you're looking for a detailed guide on React Router and how to use it in your React application. In this tutorial, you will learn how to install React Router in your app and know the basic features of the React Router and how to use them in your app.
React Router can be compared to a school with various classrooms, restrooms, staff rooms, and a clinic. In this case, React Router will assist you in easily navigating all of these locations; for example, from the staff room, you can navigate to the classroom, and so on.
Prerequisites
You need the following to get started:
Node.js installed
An understanding of components in React
Setting up our React App
We'll use Vite to create a React app instead of the usual create-react-app. I've written an article on how to create a React app with Vite; check it out here.
Copy the command below and paste it into your terminal to install react-router-dom in your app.
npm i react-router-dom
The command above installs the latest version of react-router-dom in your application.
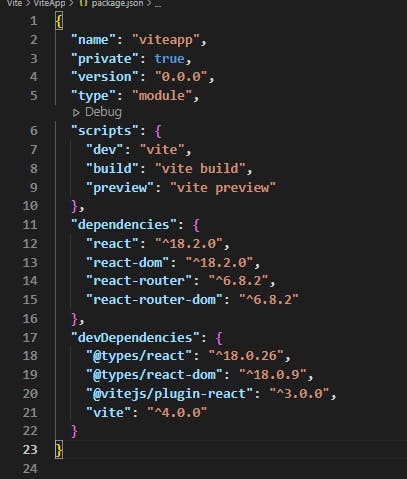
Your package.json will look like the screenshot below. You can see that react-router-dom has been added to your dependencies.
Adding BrowserRouter to main.jsx
We would have added the BrowserRouter to our index.js file if we had used create-react-app instead of Vite to create our React app. However, because we're using Vite, update your main.jsx file with the code snippet below.
import React from 'react'
import ReactDOM from 'react-dom/client'
import App from './App'
import './index.css'
import { BrowserRouter } from 'react-router-dom'

ReactDOM.createRoot(document.getElementById('root')).render(
  <BrowserRouter>
    <React.StrictMode>
      <App />
    </React.StrictMode>
  </BrowserRouter>
)
We imported the BrowserRouter from react-router-dom for our React app in the code snippet above because it provides the functionality required to implement client-side routing in a React application. When you navigate to different URLs in your application, the BrowserRouter is responsible for rendering the appropriate component based on the URL you clicked on.
We wrapped the BrowserRouter around our App component so that any component we create that is rendered by the App component can use the BrowserRouter's routing functionality.
Creating Routes in our App component
Let us first create three different components, such as the Home, About, and Contact components, before we begin creating routes in our App component.
This should be the default code in all of the components we've built.
import React from 'react'

const Home = () => {
  return (
    <div>Home</div>
  )
}

export default Home
Now, add the following code to the top of your App component.
import { Routes, Route } from 'react-router-dom'
The Routes component in the code snippet above acts as the parent to all the Route that would be created in our app.
The Route component allows us to define different routes in our React application and specify which components should be rendered when those routes are matched.
Add the code below to your App component:
import './App.css'
import { Routes, Route } from 'react-router-dom'
import Home from './components/Home'
import Contact from './components/Contact'
import About from './components/About'
import './style/All.css'

function App() {
  return (
    <div className='App'>
      <Routes>
        <Route path='/' element={<Home />}></Route>
        <Route path='/Contact' element={<Contact />}></Route>
        <Route path='/About' element={<About />}></Route>
      </Routes>
    </div>
  )
}

export default App
Let's explain what the code below does:
<Route path='/' element={<Home />}></Route>
The path prop in the code snippet above is set to '/' which means that the Route will match the root URL of your application. Assume we have a navbar with links to the home, about, and contact pages. Because the path specifies it, clicking the home link takes us to the root of our application.
We also have an instance where the path is set to '/About' and the element is set to <About/>, just like the explanation I gave for the Home component, when you click on the about link in the navbar, it navigates you to the about component because the path matches the component that was rendered.
Using Link to navigate to routes
After we've added BrowserRouter to our main.jsx file and Routes and Route to our App.jsx file, the next step is to use the Link component in any of the three components we created (Home, About, and Contact).
We'll only use Link in our Home component for this tutorial. The first step is to import Link from react-router-dom.
import { Link } from 'react-router-dom'
The Link component is clickable just like the anchor tag. It creates clickable links that enable a user to navigate between different pages in a React application.
Add the code snippet below to your Home component:
import React from 'react'
import { Link } from 'react-router-dom'

const Home = () => {
  return (
    <div>
      <nav>
        <ul>
          <Link to='/'>
            <li>Home</li>
          </Link>
          <Link to='/About'>
            <li>About</li>
          </Link>
          <Link to='/Contact'>
            <li>Contact</li>
          </Link>
        </ul>
      </nav>
    </div>
  )
}

export default Home
Remember the Route we created in the App component? When you click on any of the links ('/', '/About', or '/Contact' in the code above, it will look through your routes and render the component with the corresponding path.
So, when you click on any of the links in the navbar displayed in your browser, it renders that component.
Conclusion
We learned what React Router is, how to install it in your application, and how to use its basic features in this tutorial.